Fraud Prevention
This document provides an overview of fraud prevention tools available through PSQ Payments. It includes steps for setting up Address Verification Service (AVS) and Card Verification Value (CVV) checks, essential tools for minimizing fraudulent transactions and chargebacks.
Why use fraud prevention tools?
Fraud prevention tools like AVS and CVV checks add layers of security by verifying critical payment details. These tools help:
- Prevent unauthorized transactions
- Reduce the likelihood of chargebacks
- Increase customer trust by safeguarding sensitive information
Address Verification Service (AVS)
What is AVS?
AVS verifies the billing address provided by the customer during a transaction. It checks this information against the card issuer’s records and returns a response code indicating the level of match.
How does AVS work?
- Customer enters their billing address at checkout.
- The address is sent to the card issuer for verification.
- The issuer compares the address with the one on file.
- A response code is returned, indicating whether the address matches.
Steps to set up AVS in PSQ Payments
-
Access the Fraud Management Settings
- Log in to the Nuvei Portal.
- Navigate to Risk Configurations under the Risk section.
-
Enable AVS Verification
- Locate the AVS configuration panel.
- Enable AVS by toggling the switch or checkbox.
-
Set AVS Rules
- Define acceptable AVS response codes based on your risk tolerance:
- Full match (billing address and ZIP code match).
- Partial match (e.g., ZIP code matches but address does not).
- Set rules to automatically decline transactions for unacceptable matches.
-
Save Your Settings
- Click Save to activate the AVS settings.
Recommended AVS best practices
- Require a full AVS match for high-value transactions.
- For partial matches, flag the transaction for manual review.
- Regularly review AVS reports to refine your risk settings.
Card Verification Value (CVV)
What is CVV?
CVV is the 3- or 4-digit code printed on a customer’s payment card. It verifies that the cardholder has physical access to the card, adding a layer of protection against card-not-present (CNP) fraud.
How does CVV Work?
- Customer enters their card details, including the CVV, during checkout.
- The CVV is sent to the card issuer for verification.
- The issuer verifies the CVV and returns a response indicating whether it matches.
Steps to Set Up CVV in PSQ Payments
-
Access the Fraud Management Settings
- Log in to the Nuvei Portal.
- Navigate to Risk Configurations under the Risk section.
-
Enable CVV Verification
- Locate the CVV configuration panel.
- Enable CVV checks by toggling the switch or checkbox.
-
Set CVV Rules
- Define rules for CVV verification:
- Require a valid CVV for all transactions.
- Automatically decline transactions with invalid or missing CVVs.
-
Save Your Settings
- Click Save to activate the CVV settings.
Recommended CVV best practices
- Always require CVV for card-not-present transactions.
- Decline transactions with missing or invalid CVVs.
- Use CVV in combination with AVS for enhanced fraud protection.
How to View AVS and CVV Results for a Transaction
You can navigate to the specific transaction in the PSQ Payments Portal to review the AVS and CVV verification results. These results provide insights into the fraud prevention checks applied during the transaction.
Steps to Navigate to the Transaction and View AVS/CVV Results
1. Log in to the PSQ Payments Portal
- Go to https://portal.publicsquare.com/.
- Enter your login credentials.
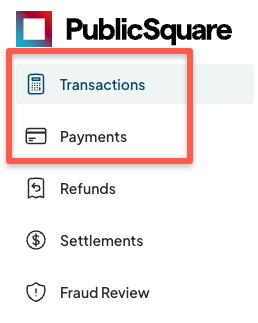
2. Access the transactions tab
- From the dashboard, click on the Transactions or Payments tab in the navigation menu.
3. Search for the transaction
- Use the search bar to find the specific transaction by name, email, transaction ID, or other identifiers.

You can search by:
- Name
- Payment ID (e.g.
pmt_1234567890) - Transaction ID (e.g.
tx_1234567890) - Date range
4. View the transaction details
- Once you locate the transaction, click on it to view the full details.
- The Transaction Details page will display all relevant payment information, including AVS and CVV results.
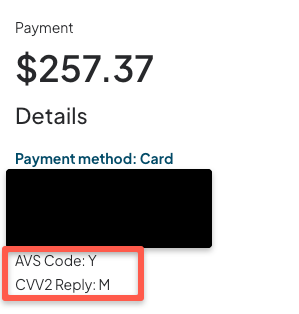
5. Review AVS results
- Look for the AVS Response field. This will display the result code returned by the card issuer.
AVS response codes
| Code | Description |
|---|---|
| Y | Address and 5-digit ZIP code match. |
| A | Address matches, but ZIP code does not. |
| Z | 5-digit ZIP code matches, but address does not. |
| N | Neither address nor ZIP code match. |
| U | Address information unavailable. |
| R | System unavailable or timed out. |
| S | Service not supported by issuer. |
| E | AVS data is invalid or formatted incorrectly. |
| G | Address verification not supported for international cards. |
| C | Address and postal code match for international cards. |
| I | Address only matches for international cards. |
| X | Address and 9-digit ZIP code match. |
| W | 9-digit ZIP code matches, but address does not. |
| B | Address matches, but ZIP code not verified. |
| D | Address and postal code match for international cards. |
6. Review CVV results
- Check the CVV Response field. This will indicate whether the CVV provided by the customer matched the card issuer’s records.
CVV response codes
| Code | Description |
|---|---|
| M | CVV matches. |
| N | CVV does not match. |
| P | CVV not processed. |
| S | CVV should have been present but was not indicated. |
| U | Issuer is not certified or has not provided CVV verification. |
| I | Invalid CVV. |