Quick Start
This quick guide will walk you through the steps to set up your account and start accepting payments with PublicSquare.
Setup
Create an Account
To get started, you will need a PublicSquare Account.
Test vs Production Mode
When you sign up for a PublicSquare account, you’ll automatically gain access to a test environment.
This environment lets you perform dummy transactions, test your integration, and ensure everything functions as expected.
When you're ready to go live, you can switch to production mode.
Please note that to enable the production environment and process live transactions,
you'll need to complete your account setup and go through the onboarding process.

Accepting Payments
Install PublicSquare Elements
NPM
- JavaScript
- React
npm install --save @publicsquare/elements-js
npm install --save @publicsquare/elements-react
Yarn
- JavaScript
- React
yarn add @publicsquare/elements-js
yarn add @publicsquare/elements-react
For detailed information on SDKs and instructions on how to configure them, please refer to the links below:
Collect card
Get your Publishable Key
You'll need your Publishable Key to set up PublicSquare Elements and collect card information.
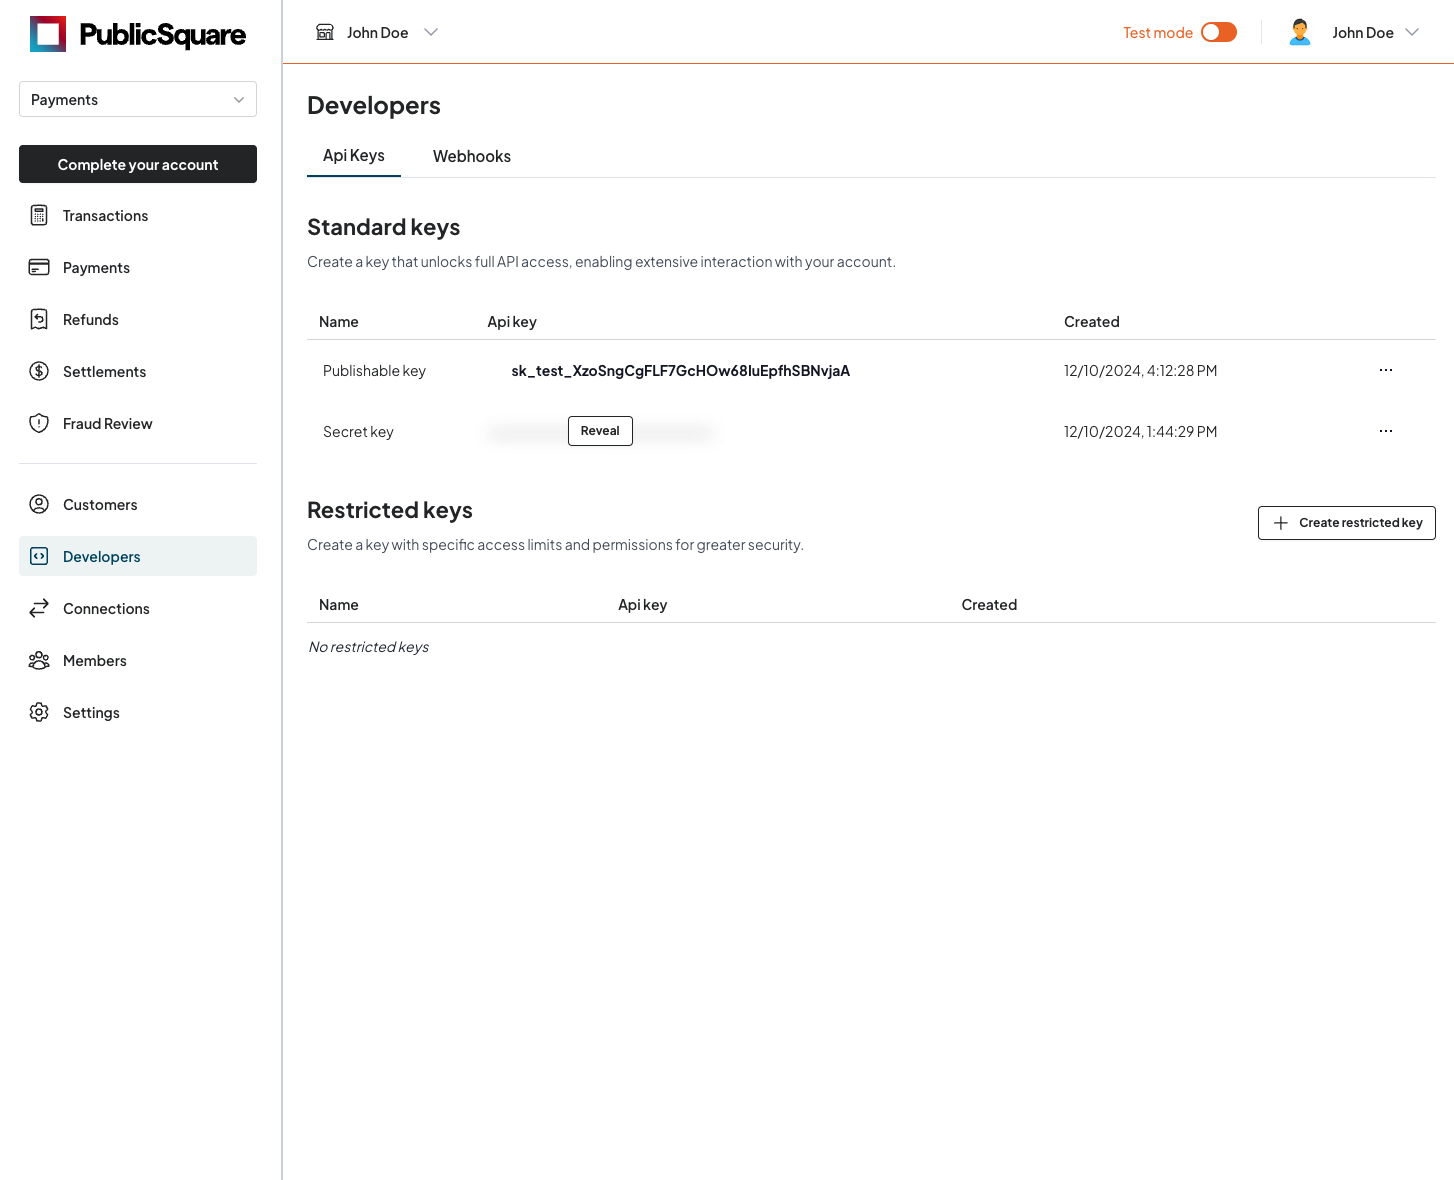
Navigate to the Developers section of your account,
click Reveal next to your Publishable Key, and copy the displayed value.

Publishable Key, as you will need it for the next steps in this guide.Add Card Element
After installing and configuring the SDK, you can add the Card Element to your page to securely store card information.
- JavaScript
- React
<div>
  <input
    type="text"
    id="cardholderName"
    placeholder="Cardholder Name"
    style="width: 100%; padding: 10px; margin-bottom: 20px;"
  />
</div>
<div id="card"></div>
<div>
  <button
    style="display: inline-block; padding: 10px; margin-top: 30px; width: 100%; background-color: blue; color: white;"
    type="submit"
  >
    Submit
  </button>
</div>
    import {PublicSquare} from '@publicsquare/elements-js';

    let publicsquare;
    let cardElement;

    async function init() {
      let publicsquare = await new PublicSquare().init('<PUBLISHABLE_KEY>');
      // Creates Element instance
      cardElement = publicsquare.createCardElement();
      cardElement.mount('#card');
    }
    init();
import React, { useRef } from "react";
import {
CardElement,
PublicSquareProvider,
usePublicSquare,
} from "@publicsquare/elements-react";

export default function App() {
  const { publicsquare } = usePublicSquare();
  // Refs to get access to the Elements instance
  const cardholderNameRef = useRef(null);
  const cardRef = useRef(null);
  const apiKey = "<PUBLISHABLE_KEY>";

  return (
    <div
    style={{
    position: "absolute",
    width: "40%",
    top: "20%",
    left: "30%",
    }}
    >
      <PublicSquareProvider apiKey={apiKey}>
        <div>
          <input
            type="text"
            id="cardholderName"
            placeholder="Cardholder Name"
            ref={cardholderNameRef}
            style={{ width: "100%", padding: "10px", marginBottom: "20px" }}
          />
        </div>
        <div>
          <CardElement id="card" ref={cardRef} />
        </div>
        <div>
          <button
            style={{display: "inline-block", padding: "10px", marginTop: "30px", width: "100%", backgroundColor: "blue", color: "white"}}
            type="submit"
          >
            Submit
          </button>
        </div>
      </PublicSquareProvider>
    </div>
  );
}
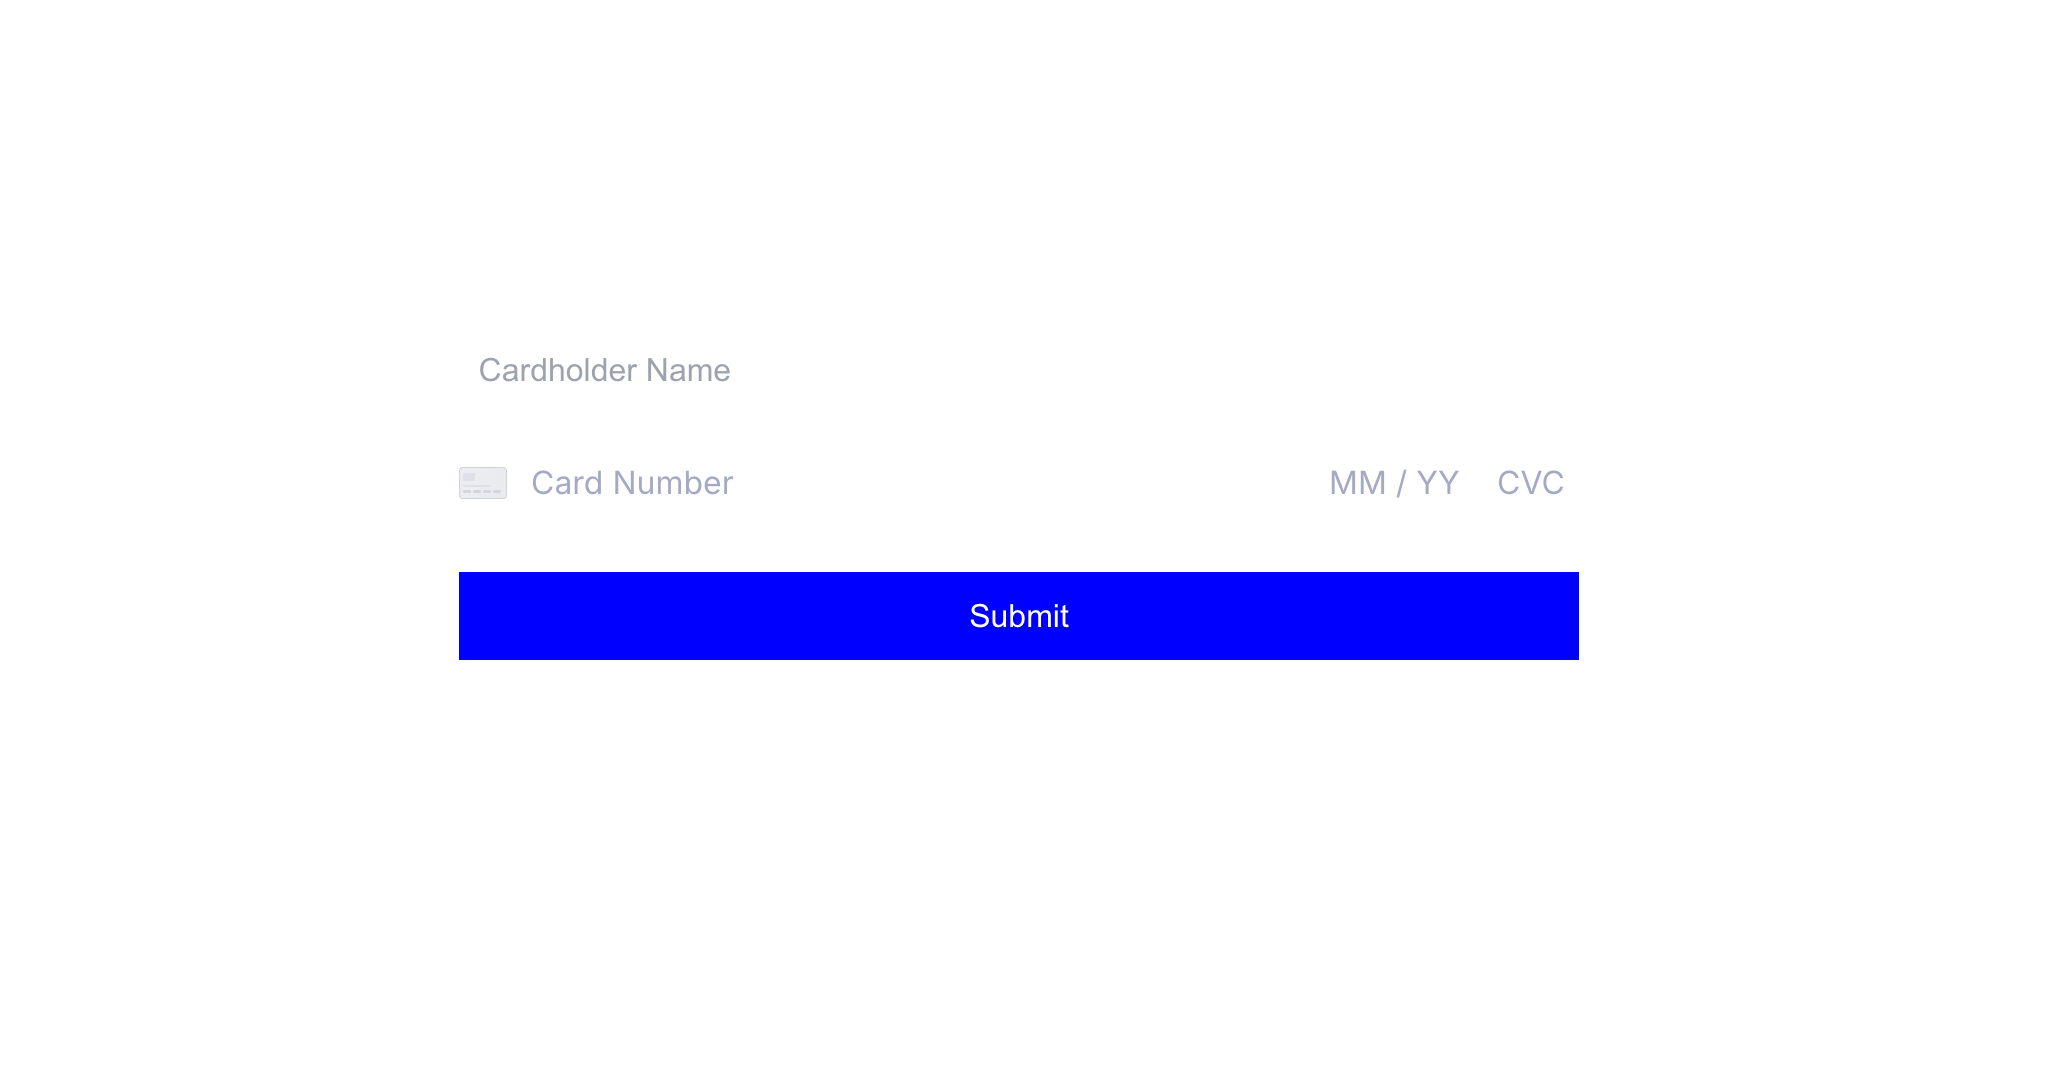
The Card Element should now be visible on your page:

Create Card Object
After collecting the card details, you can create a card object by calling the createCard method from the SDK.
Pass the Card Element as part of the payload in the request.
To initiate this process, associate a submit function with a button to trigger the card creation.
- JavaScript
- React
  async function init () {
    ...
    document.getElementById("submit").addEventListener("click", submit);
  }

  async function submit (e: FormEvent<HTMLFormElement>,) {
    try {
      const formData = new FormData(e.currentTarget)
      const card = await publicsquare.cards.create({
        cardholder_name: formData.cardholderName,
        card: cardElement,
      });
      // store card.id in your database
    } catch (error) {
        console.error(error);
    }
  }
  init();
export default function App() {
  const submit = async () => {
    try {
      const card = await publicsquare?.cards.create({
        cardholder_name: cardholderNameRef.current,
        card: cardRef.current,
      });
    // store card.id in your database
    } catch (error) {
      console.error(error);
    }
  }

  return (
    ...
  );
}
The created card object contains non-sensitive information:
  {
    "id": "card_AjkCFKAYiTsjghXWMzoXFPMxj",
    "account_id": "acc_B518niGwGYKzig6vtrRVZGGGV",
    "environment": "test",
    "cardholder_name": "John Smith",
    "last4": "4242",
    "exp_month": "12",
    "exp_year": "2025",
    "brand": "visa",
    "fingerprint": "CC2XvyoohnqecEq4r3FtXv6MdCx4TbaW1UUTdCCN5MNL",
    "created_at": "2024-06-30T01:02:29.212Z",
    "modified_at": "2024-06-30T01:02:29.212Z"
  }
In the next step, we will use the id to process the payment.
You can learn more about the card object in the API Reference.
Process a Payment
Get your Secret Key
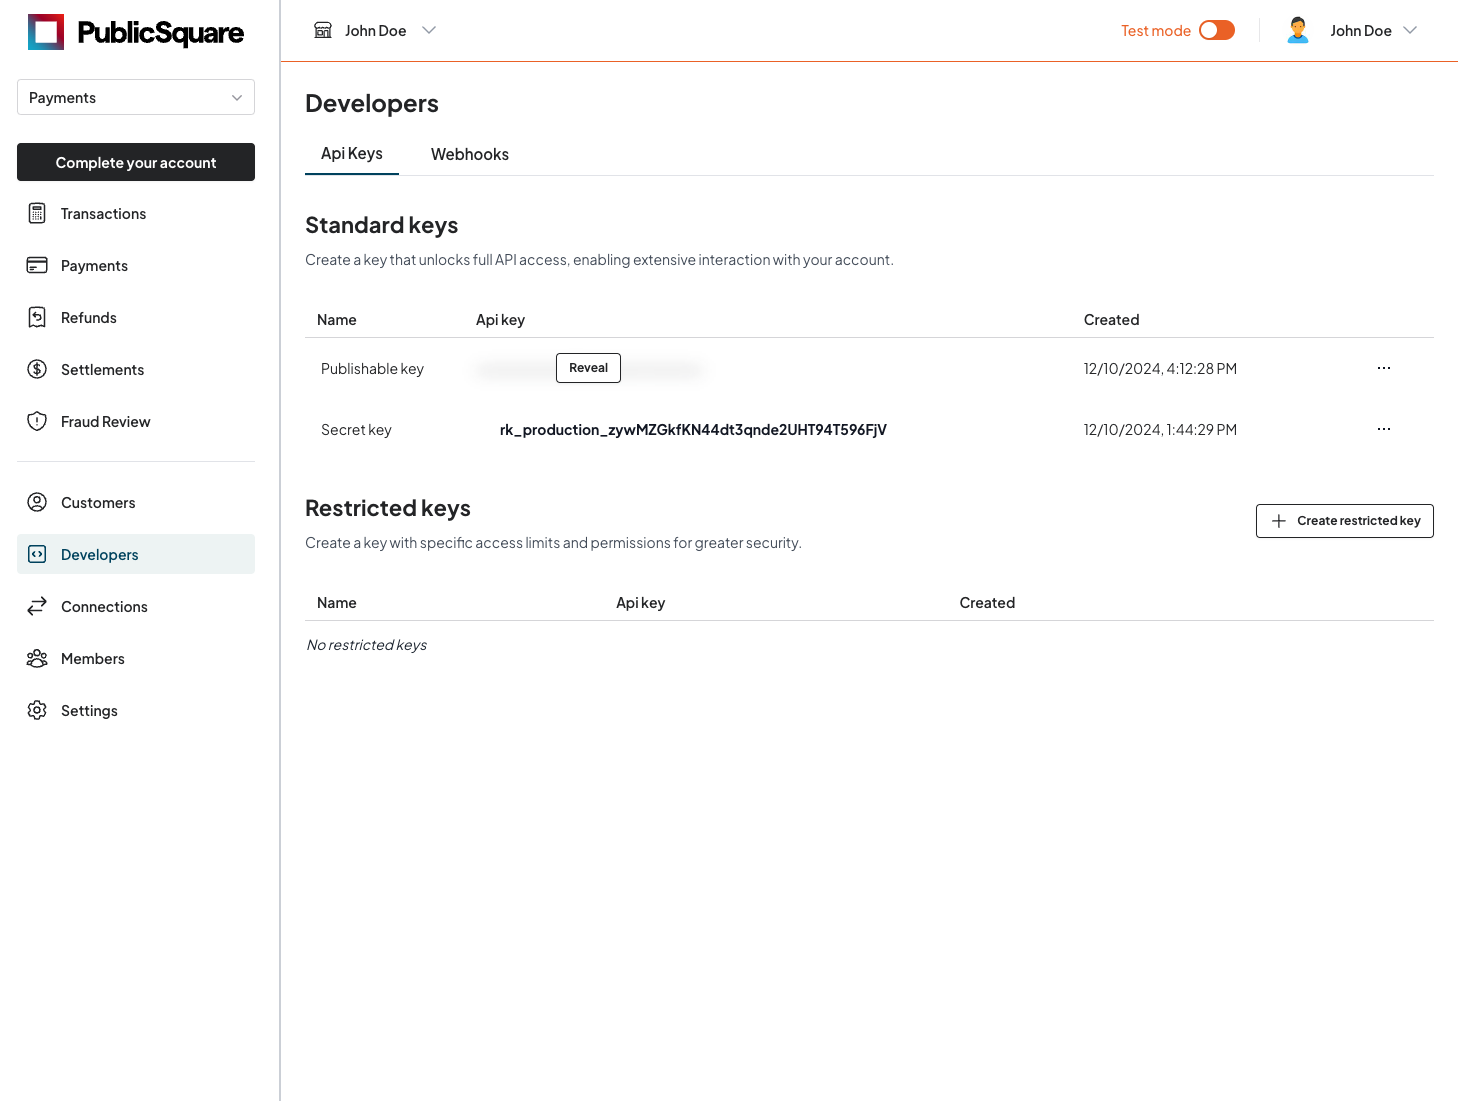
Next, you'll need your Secret Key. Navigate to the Developers section on your account, click "Reveal" next to your Secret Key, and copy the displayed value.

Secret Key, as it will be required for the next steps in this guide.Create Payment
Now, we will create a payment object using the card object we created earlier. To achieve this, we will construct a payment request object and send it to the PublicSquare API.
- CURL
- Node.js
- Axios
- Java (OkHttp)
- Python
  curl 'https://api.publicsquare.com/payments' \
  -X 'POST' \
  -H 'X-API-KEY: <SECRET_KEY>' \
  -H 'IDEMPONTENCY-KEY: 09ec2c87-7fb8-44ca-bb18-5c71a76974da' \
  -H 'Content-Type: application/json' \
  -d '{
      "amount": 16734,
      "currency": "USD",
      "paymentMethod": {
        "card": "card_AjkCFKAYiTsjghXWMzoXFPMxj"
      },
        "customer": {
        "first_name": "Addison",
        "last_name": "Daniel",
        "email": "Ethelyn50@hotmail.com"
      },
        "billing_details": {
        "address_line_1": "355 Pearl Way",
        "address_line_2": "Suite 345",
        "city": "Camden",
        "state": "OR",
        "postal_code": "59969",
        "country": "US"
      }
  }'
  fetch('https://api.publicsquare.com/payments', {
    method: 'POST',
    headers: {
      'X-API-KEY': '<SECRET_KEY>',
      'IDEMPONTENCY-KEY': '09ec2c87-7fb8-44ca-bb18-5c71a76974da',
      'Content-Type': 'application/json',
    },
    body: JSON.stringify({
        "amount": 16734,
        "currency": "USD",
        "paymentMethod": {
          "card": "card_AjkCFKAYiTsjghXWMzoXFPMxj"
        },
          "customer": {
          "first_name": "Addison",
          "last_name": "Daniel",
          "email": "Ethelyn50@hotmail.com"
        },
          "billing_details": {
          "address_line_1": "355 Pearl Way",
          "address_line_2": "Suite 345",
          "city": "Camden",
          "state": "OR",
          "postal_code": "59969",
          "country": "US"
        }
    }),
  })
  .then(response => response.json())
  .then(data => console.log(data))
  .catch(error => console.error('Error:', error));
const axios = require('axios');

axios.post(
'https://api.publicsquare.com/payments',
{
    "amount": 16734,
    "currency": "USD",
    "paymentMethod": {
      "card": "card_AjkCFKAYiTsjghXWMzoXFPMxj"
    },
      "customer": {
      "first_name": "Addison",
      "last_name": "Daniel",
      "email": "Ethelyn50@hotmail.com"
    },
      "billing_details": {
      "address_line_1": "355 Pearl Way",
      "address_line_2": "Suite 345",
      "city": "Camden",
      "state": "OR",
      "postal_code": "59969",
      "country": "US"
    }
},
{
  headers: {
    'X-API-KEY': '<SECRET_KEY>',
    'IDEMPONTENCY-KEY': '09ec2c87-7fb8-44ca-bb18-5c71a76974da',
    'Content-Type': 'application/json',
  },
})
.then(response => console.log(response.data))
.catch(error => console.error('Error:', error));
import okhttp3.*;

public class Main {
  public static void main(String[] args) throws Exception {
      OkHttpClient client = new OkHttpClient();

      String json = """
      {
          "amount": 16734,
          "currency": "USD",
          "paymentMethod": {
            "card": "card_AjkCFKAYiTsjghXWMzoXFPMxj"
          },
            "customer": {
            "first_name": "Addison",
            "last_name": "Daniel",
            "email": "Ethelyn50@hotmail.com"
          },
            "billing_details": {
            "address_line_1": "355 Pearl Way",
            "address_line_2": "Suite 345",
            "city": "Camden",
            "state": "OR",
            "postal_code": "59969",
            "country": "US"
          }
      }
      """;

  RequestBody body = RequestBody.create(json, MediaType.get("application/json"));

      Request request = new Request.Builder()
          .url("https://api.publicsquare.com/payments")
          .post(body)
          .addHeader("X-API-KEY", "<SECRET_KEY>")
          .addHeader("IDEMPONTENCY-KEY", "09ec2c87-7fb8-44ca-bb18-5c71a76974da")
          .addHeader("Content-Type", "application/json")
          .build();

      try (Response response = client.newCall(request).execute()) {
          System.out.println(response.body().string());
      }
  }
}
import requests

url = "https://api.publicsquare.com/payments"
headers = {
    "X-API-KEY": "<SECRET_KEY>",
    "IDEMPONTENCY-KEY": "09ec2c87-7fb8-44ca-bb18-5c71a76974da",
    "Content-Type": "application/json"
}
payload = {
    "amount": 16734,
    "currency": "USD",
    "paymentMethod": {
        "card": "card_AjkCFKAYiTsjghXWMzoXFPMxj"
    },
    "customer": {
      "first_name": "Addison",
      "last_name": "Daniel",
      "email": "Ethelyn50@hotmail.com"
    },
    "billing_details": {
      "address_line_1": "355 Pearl Way",
      "address_line_2": "Suite 345",
      "city": "Camden",
      "state": "OR",
      "postal_code": "59969",
      "country": "US"
    }
}

response = requests.post(url, json=payload, headers=headers)

print(response.status_code)
print(response.json())
IDEMPONTENCY-KEY header can be passed to protect against duplicate payments being processed.You should see a payment object similar to:
{
  "id": "pmt_2YKewBonG4tgk12MheY3PiHDy",
  "account_id": "acc_B518niGwGYKzig6vtrRVZGGGV",
  "environment": "test",
  "status": "successful",
  "transaction_id": "Iccc2b54-eb27-4eb4-9d3e-2763156123a8",
  "amount": "16734",
  "amount_charged": "1000",
  "amount_refunded": "0",
  "refunded": "false",
  "currency": "USD",
  "payment_method": {
    "card": {
      "id": "card_AjkCFKAYiTsjghXWMzoXFPMxj",
      "cardholder_name": "Joy Dicki",
      "last4": "93c7",
      "exp_month": "12",
      "exp_year": "2025",
      "fingerprint": "CC2XvyoohnqecEq4r3FtXv6MdCx4TbaW1UUTdCCN5MNL"
    }
  },
  "customer": {
    "id": "cus_7Ay5mcUXAxwrN6wQEQUVEHBCJ",
    "first_name": "Addison",
    "last_name": "Daniel",
    "email": "Ethelyn50@hotmail.com"
  },
  "billing_details": {
    "address_line_1": "355 Pearl Way",
    "address_line_2": "Suite 345",
    "city": "Camden",
    "state": "OR",
    "postal_code": "59969",
    "country": "US"
  },
  "shipping_address": {
    "address_line_1": "740 Douglas Road",
    "address_line_2": "Suite 415",
    "city": "Port Miguel",
    "state": "WA",
    "postal_code": "68848",
    "country": "US"
  },
  "fraud_decision": {
    "decision": "accept"
  },
  "created_at": "2024-06-30T01:02:29.212Z",
  "modified_at": "2024-06-30T01:02:29.212Z"
}
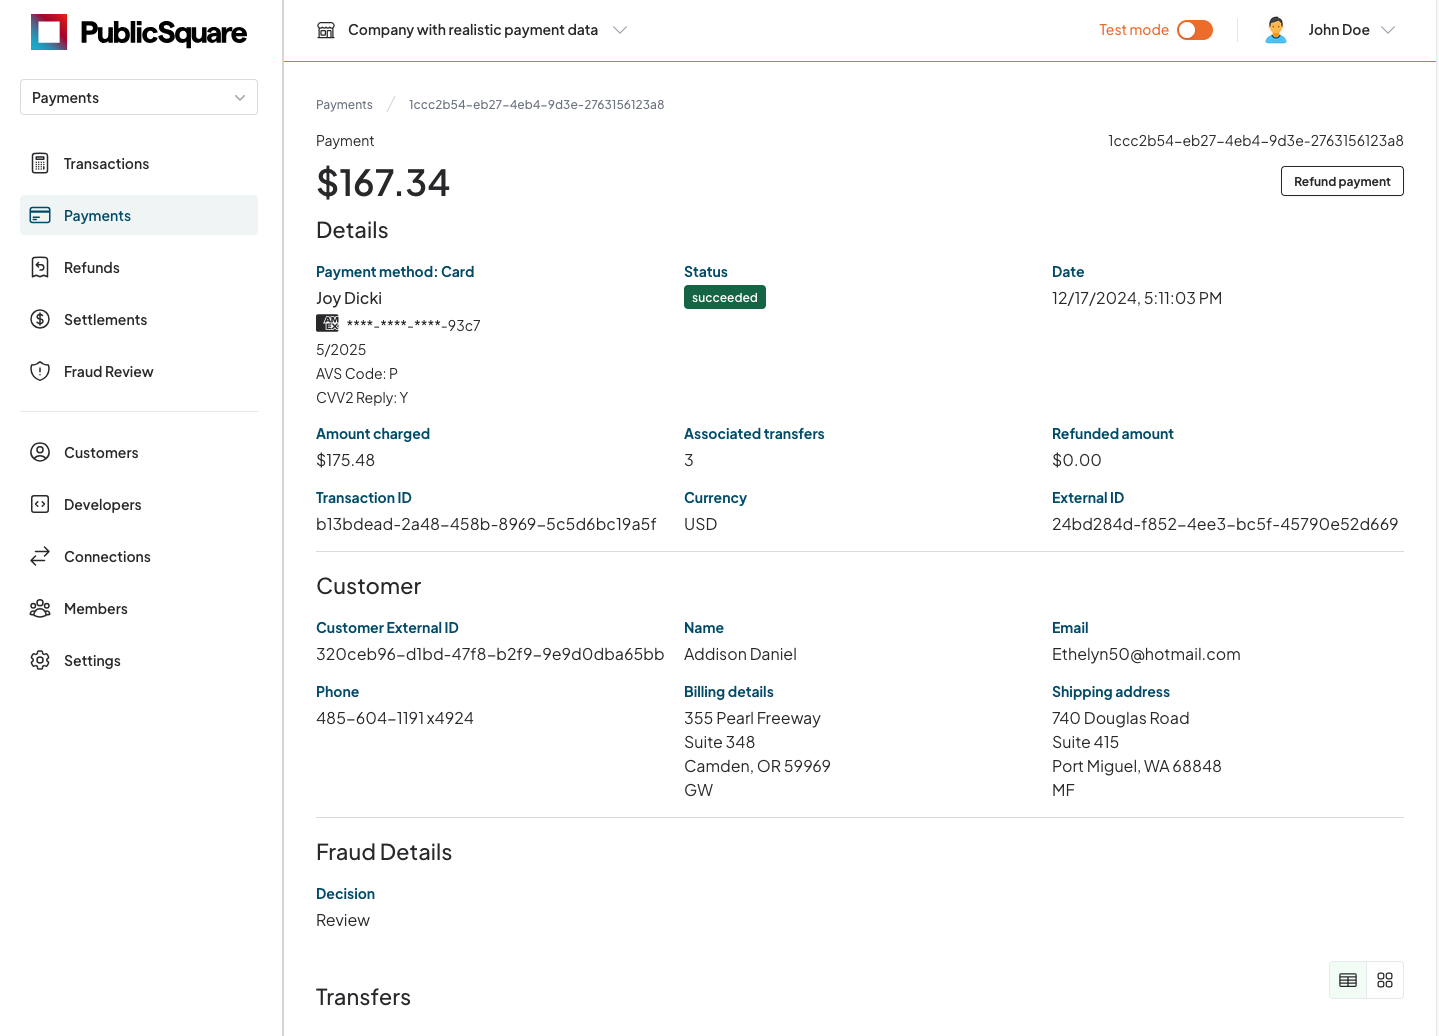
Additionally, if you open the portal and navigate to Payments, you'll find the payment object listed. Click on it to view more details.

You can learn more about the payment object in the API Reference.
Conclusion
You have successfully collected card information, created a card object, and processed a payment using PublicSquare Elements. Follow these guides to learn more: